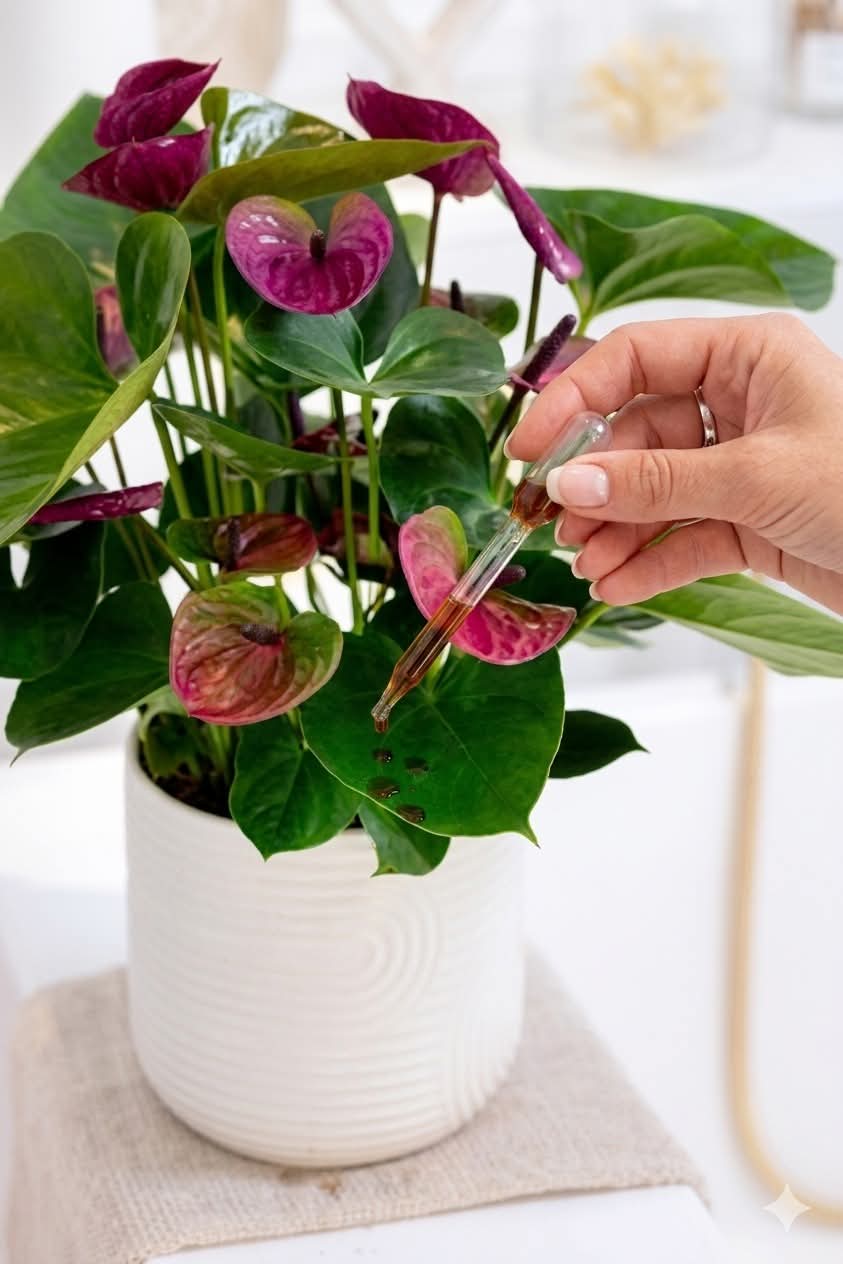
If you are an indoor plant parent, houseplant enthusiast, or green thumb aiming to trigger explosive, vibrant spathe blooms on your Anthurium plant, look no further 🌺✨! Anthuriums are world-renowned for their glossy heart-shaped foliage and striking waxy blooms that add a tropical elegance to any living space. Feeding your potted specimens with mild, organic liquid teas—such as diluted liquid kelp, fermented rice water, or bio-active humic acid drops—delivers bioavailable potassium and trace minerals right where the plant needs them most 🛡️🌿.
By applying targeted nutrient solutions using a precise glass dropper or applying diluted root drenches, you nourish beneficial soil microbes, strengthen leaf cuticle layers, and promote continuous flowering cycles. Let’s break down the complete ingredient matrix, step-by-step 4-stage care guide, potting substrate specifications, and professional botanical secrets for guaranteed houseplant success!
🛒 Master Ingredient Matrix & Botanical Care Specifications
Nurturing a healthy, free-blooming Anthurium requires balancing targeted organic nutrients, high-porosity potting media, proper ceramic drainage containers, and soft indirect lighting 🌺🛡️. Here is your master specifications breakdown 📋✨:
| Care Component | Material & Tool Specifications | Botanical Function & Horticultural Impact | Recommended Organic Alternatives |
|---|---|---|---|
| Plant Specimen 🌿 | Purple/Pink Anthurium andraeanum | Primary tropical specimen featuring waxy purple spathes and glossy green foliage (pictured center). | Red Anthurium, Peace Lily, or Orchid. |
| Bio-Active Elixir 🧪 | Humic Acid / Liquid Seaweed Dropper | Delivers concentrated trace minerals, potassium, and organic acids to stimulate blooms (pictured). | Diluted Coffee Ground Extract, Banana Peel Tea, or Molasses Water. |
| Dropper Applicator 💧 | Glass Pipette / Liquid Dropper | Allows exact, controlled dosage application directly onto root zones or leaf surfaces (pictured). | Small Measuring Spoon, Pipette, or Spray Mister. |
| White Pot Container 🏺 | Ribbed Ceramic Pot with Catch Saucer | Holds coarse epiphytic potting mix while elevating aesthetic indoor decor (pictured). | Terracotta Clay Pot or Plastic Nursery Pot with Holes. |
| Aerated Substrate 🪵 | Orchid Bark + Perlite + Peat Moss | Chunky, free-draining medium that mimics epiphytic rainforest tree conditions and prevents root rot. | Coco Coir Chips mixed with Pumice Granules. |
| Light Environment ☀️ | Bright, Indirect Ambient Light | Fuels active photosynthesis and energy production required for continuous spathe formation (pictured). | Diffused LED Grow Lamp setup. |
👩🌾 Step-by-Step Anthurium Organic Feeding & Care Guide
Follow this simple 4-stage botanical care guide to inspect your plant, prepare a gentle nutrient-rich elixir, apply targeted feeding, and support a stunning tropical display, exactly as featured in the indoor plant setup 🌺✨!
Step 1: Inspect Foliage & Aerate Epiphytic Substrate 🛠️🪵
- Position your potted Anthurium on a clean cloth-covered table in a bright, well-lit room (as shown in the main image).
- Inspect the glossy green leaves and waxy purple spathes for signs of dust, water spots, or pests.
- Take a clean wooden skewer or small fork and gently loosen the top 1/2 inch of substrate around the pot perimeter.
- Botanical Secret: Aerating chunky orchid bark mixes ensures liquid nutrients soak deep into active root systems rather than draining too quickly down the inside walls of the pot!
- Gently wipe foliage with a moist microfiber cloth to maximize light absorption for photosynthesis.
Step 2: Prepare a Gentle Bio-Active Liquid Elixir 🥣🧪
- Avoid concentrated chemical synthetic fertilizers, as excess fertilizer salts cause severe leaf tip burn on sensitive Anthurium roots!
- Prepare a mild, bio-active liquid feeding solution using organic household elements:
- Liquid Seaweed / Kelp Extract: Mix 1/2 teaspoon of liquid kelp into 1 quart of warm water for a natural dose of potassium and growth hormones.
- Humic & Fulvic Acid Solution: Dilute a few drops of natural humic acid into distilled water to enhance micronutrient uptake and improve soil structure (as featured in the glass dropper).
- Banana Peel Infusion: Steep dried banana skins in filtered water for 48 hours to extract potassium that fuels bright spathe colors.
- Ensure the liquid solution reaches room temperature before application to prevent root shock.
Step 3: Apply Liquid Elixir Target-wise with Precision 💧🌱
- Draw up your prepared room-temperature organic liquid feed into a clear glass pipette dropper (as demonstrated in the central action shot).
- Dispense liquid feed drop-by-drop directly over the central root zone or onto target foliage leaves where foliar absorption takes place.
- Using a dropper permits precise dosage control, preventing soggy soil over-saturation while ensuring delicate leaf bases remain clean and healthy!
- For soil drenches, allow excess liquid to drain freely out of the bottom ceramic pot holes, discarding standing water after 15 minutes.
Step 4: Manage Light, Humidity & Bloom Maintenance ☀️📈
- Place your treated Anthurium in a warm spot receiving bright, indirect sunlight (65°F to 80°F / 18°C to 27°C).
- Anthuriums thrive near bright windows where direct, scorching sun rays are filtered out by sheer curtains.
- Maintain high humidity around the plant (60% or higher) by grouping it with other tropical plants or running a cool-mist humidifier nearby.
- Water consistently whenever the top 1 to 2 inches of chunky substrate feel dry to the touch—Anthurium roots need oxygen as much as moisture!
- Trim away old, faded spathes near the stem base using sterile snips to encourage the plant to produce fresh new blooms.
💡 Pro Secrets for Spectacular Anthurium Blooms
- Master the Epiphytic Mix: Never plant Anthuriums in heavy potting soil! Always use a loose, chunky blend of orchid bark, perlite, charcoal, and peat moss to keep roots aerated 🪵.
- Keep Leaves Shiny & Clean: Regularly dusting leaves allows maximum light penetration, which directly correlates to how many bright spathes your plant can push out 🌺!
- Maintain High Ambient Humidity: Crisp brown leaf edges often indicate low room humidity. Misting surrounding air or using a pebble tray keeps tropical foliage pristine 🛡️.
Incorporate this simple organic feeding routine into your houseplant care schedule today to encourage thick glossy foliage, healthy roots, and a continuous show of vibrant waxy blooms! 🌺✨🛡️🌿🌸