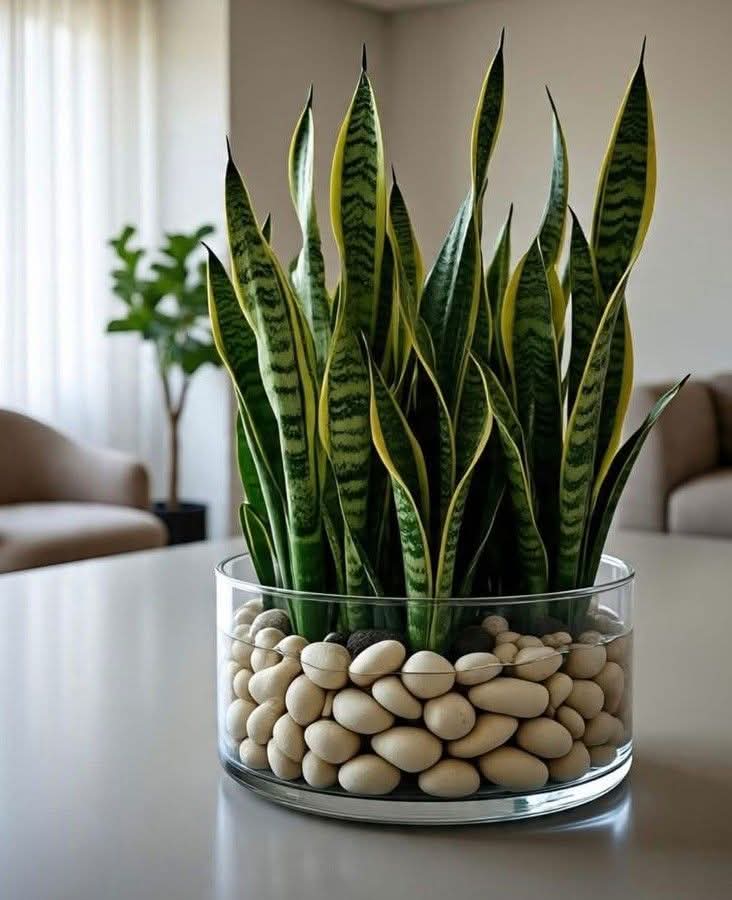
If you are an indoor plant parent, houseplant enthusiast, or green thumb seeking a sleek, modern, soil-free way to showcase Snake Plants (Sansevieria) in your home, look no further 🪴✨! Snake Plants are famous worldwide for their striking upright foliage, variegated gold-and-green edges, and air-purifying qualities. Cultivating these hardy succulents hydroponically inside a clear glass cylinder using smooth white pebbles and water creates a stunning living centerpiece that brings minimalist elegance to any table setting 🛡️🌿.
By securing root structures between smooth decorative stones and maintaining a low water line, you provide oxygen to underground rhizomes while preventing stagnant water rot. Let’s break down the complete material matrix, step-by-step 4-stage planting guide, glass container maintenance specifications, and professional hydroponic secrets for guaranteed houseplant success!
🛒 Master Material Matrix & Botanical Specifications
Growing a healthy, soil-free Snake Plant in a clear glass planter requires balancing smooth support stones, pure filtered water, proper glass vessel dimensions, and ambient indoor lighting 🪴🛡️. Here is your master specifications breakdown 📋✨:
| Care Component | Material & Tool Specifications | Botanical Function & Horticultural Impact | Recommended Natural Alternatives |
|---|---|---|---|
| Plant Specimen 🪴 | Variegated Sansevieria Laurentii | Primary succulent featuring tall, sword-like green leaves with bright yellow margins (pictured center). | Sansevieria Zeylanica or Cylindrical Snake Plant. |
| Glass Vessel 🏺 | Clear Cylindrical Glass Bowl | Holds water and pebble medium while offering complete visual monitoring of root health (pictured). | Glass Terrarium Bowl or Cylinder Vase. |
| Substrate Medium 🪨 | Smooth White River Pebbles | Provides structural anchor support for heavy vertical leaves without compacting roots (pictured). | Volcanic Lava Rocks, Expanded Clay Pebbles (LECA), or Marbles. |
| Liquid Medium 💧 | Distilled or Filtered Water | Delivers clean moisture directly to root bases without chlorine or fluoride buildup (pictured). | Rainwater or Settled Tap Water. |
| Nutrient Solution 🧪 | Hydroponic Liquid Fertilizer | Supplies trace minerals (nitrogen, potassium) for active leaf synthesis in soil-free setups. | Liquid Seaweed Extract (1 drop per month). |
| Light Environment ☀️ | Bright, Indirect Window Light | Fuels steady photosynthesis and maintains yellow leaf borders without algae bloom (pictured background). | Diffused |
👩🌾 Step-by-Step Glass Bowl Snake Plant Setup Guide
Follow this simple 4-stage botanical care guide to prepare your plant, clean root systems, layer smooth river stones in glass, and maintain optimal water levels, exactly as featured in the modern home setup 🪴✨!
Step 1: Unpot Specimen & Clean Root System Thoroughly 🛠️💧
- Carefully remove your Snake Plant (Sansevieria) from its original nursery pot.
- Gently shake off loose soil clumps surrounding the main root ball and underground rhizomes.
- Submerge roots in a bucket of room-temperature water to soften remaining dirt particles.
- Rinse roots thoroughly under lukewarm running water until every trace of soil is washed away.
- Botanical Secret: Cleaning soil completely off roots prevents organic decay and bacteria bloom when submerged in a hydroponic glass bowl environment!
- Inspect root strands and snip away any damaged or soft root tips using sterilized scissors.
Step 2: Prepare & Sterilize Glass Vessel & River Stones 🏺🪨
- Wash your clear glass cylindrical bowl thoroughly with warm water and mild soap, then rinse clean to ensure no residue remains.
- Place smooth white river pebbles into a colander and rinse under hot water to eliminate dust and silt.
- Pour a 1-to-2-inch base layer of clean river stones across the bottom of the glass bowl (as shown in the central photo).
- Horticultural Secret: A solid bottom stone layer elevates root crowns slightly above the base, allowing water to circulate freely without crushing delicate root tips!
Step 3: Position Snake Plant & Anchor with River Pebbles 🪴🪨
- Center your cleaned Snake Plant upright on top of the base pebble layer inside the glass bowl.
- Hold the tall, sword-like leaves steady with one hand to keep the plant vertically aligned.
- Gently fill remaining smooth white pebbles around the base of central stems using your other hand (as captured in the showcase image).
- Pack pebbles snugly around stem bases so the plant stands completely stable without wobbling or tilting.
Step 4: Add Filtered Water & Manage Maintenance 💧☀️
- Pour distilled or filtered room-temperature water into the glass bowl until the liquid reaches only the lower third of the pebble layer.
- Keep the water line low so only the lowest root tips touch water—do not submerge central green leaves or rhizome crowns!
- Position your glass vessel on a clean table in a bright room receiving indirect sunlight (65°F to 80°F / 18°C to 27°C).
- Change the water completely every 2 to 3 weeks to prevent algae buildup on glass walls and refresh dissolved oxygen levels.
- Add 1 tiny drop of liquid hydroponic fertilizer to the fresh water every month during active spring and summer growth.
💡 Pro Secrets for Thriving Hydroponic Snake Plants
- Keep Water Lines Low: Over-filling the glass bowl causes central rhizome crowns to rot! Ensure water level barely touches root tips so air circulates through upper pebbles 💧.
- Control Algae Growth: Excessive direct sunlight causes green algae to form on white stones! Keep your glass bowl in bright, filtered indirect light to keep glass crystal clear ☀️.
- Use Filtered or Distilled Water: Tap water minerals and chlorine cause brown leaf tips over time. Always use distilled or purified water for soil-free arrangements 🏺.
Incorporate this clean, modern hydroponic planting technique into your indoor plant care routine today to enjoy striking vertical green foliage and elegant glass decor! 🪴✨🛡️🌿🌸