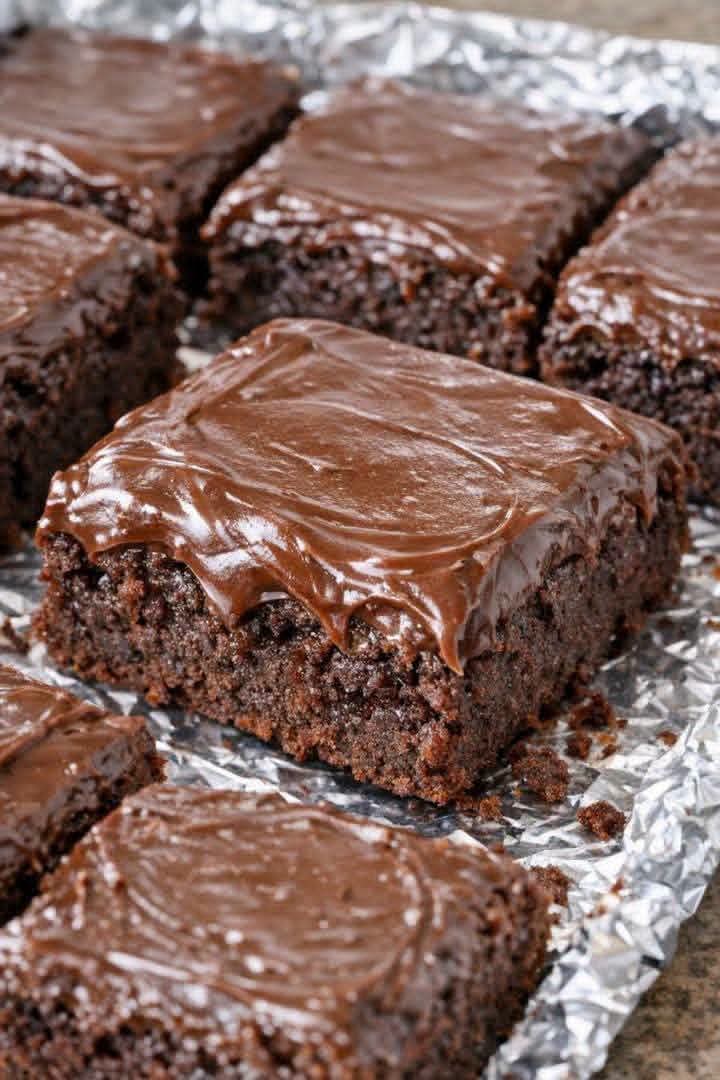
🟢Let’s talk about that moment. The one where you see a perfect square of chocolate cake, its top a gleaming, swirled sea of rich frosting. Your eyes widen, your mouth starts to water, and a single thought takes over: I need a bite. That’s not just a cake; it’s a promise of pure, unadulterated comfort.
🟢Welcome to the definitive guide to creating that cake—the ultimate Chocolate Sheet Cake. We aren’t talking about a dry, box-mix afterthought. This is a from-scratch masterpiece designed for sharing, for celebrating, and for those Tuesday nights when only serious chocolate will do. We will dive deep into why this recipe works, how to achieve that coveted texture, and how to make it look as professional as the one in the photo. 🤩
The Magic of the Sheet Cake
🟢Why a sheet cake? Why not a towering layer cake or a delicate torte? The sheet cake’s beauty lies in its humble efficiency and its democratic spirit. It bakes faster, cools quicker, and is unparalleled for feeding a crowd. Each square offers a perfect ratio of moist cake to luscious frosting. It’s the potluck hero, the birthday favorite, and the ultimate “we just got good news” celebration cake. 🥳
🟢But don’t let its simplicity fool you. Creating a perfect sheet cake requires understanding its core elements. The image we’re admiring isn’t just lucky; it’s the result of precise ingredients and careful technique. Look closely at that texture—it’s moist, almost fudge-like, yet retains a light crumb. That’s the target.
Deciphering the Perfect Texture: Moist, Fudgy, and Irresistible
🟢What makes a chocolate cake truly memorable? It’s all about texture and flavor depth. The image shows us a cake that is dense without being heavy, and moist without being soggy. Achieving this requires a careful balance.
- The Moisture Makers: In high-quality chocolate sheet cakes, moisture doesn’t just come from oil. Often, ingredients like buttermilk, sour cream, or even hot water or coffee are the secret weapons. They react with the leavening agents and tenderize the gluten, resulting in that melt-in-your-mouth feel.
- The Flavor Engine: We’re going for a deep, rich chocolate flavor. This isn’t achieved by just adding more sugar. Instead, it’s about quality cocoa powder (preferably Dutch-processed for a smoother taste) and sometimes a touch of espresso powder to accentuate the chocolate. The interaction between the sugar, fat, and cocoa creates a fudgy depth.
- The Perfect Crumb: We want a cake that holds together when cut, as seen in the photograph’s clean squares. Over-mixing leads to tunneling and toughness. We mix just until the dry ingredients are incorporated, ensuring a tender, professional crumb.
The Crown Jewel: The Silky, Swirled Frosting
🟢A sheet cake is only as good as its frosting. The image captures this element beautifully. The frosting isn’t just slathered on; it’s applied with intention. It’s thick, shiny, and shows those beautiful swirls that signal a homemade, rich creation.
🟢This is likely a cooked-style chocolate frosting or a very decadent buttercream. The glossiness suggests that the chocolate was melted and combined with fats and sugars in a way that creates a smooth emulsion. When you apply it slightly warm, it flows gently over the cake, filling every nook and cranny. Those swirls are made by using the back of a spoon or an offset spatula with a light touch, creating visual texture and pooling spots for the flavor. 🥄✨
Key Features of a Masterpiece Sheet Cake
🟢Let’s break down the visible markers of success we can see in our reference image and what they mean for the baker:
| Feature | Visual Indicator (from photo) | Meaning for the Baker | How to Achieve It |
|---|---|---|---|
| Moisture | Dark, slightly sticky-looking crumb; sheen on cut surfaces. | Cake is tender, not dry. | Don’t overbake! Use ingredients like buttermilk; use a timer. Check with a toothpick. |
| Texture | Dense enough to hold its shape as a square; clean cuts. | Cake is fudgy and substantial, not airy or spongy. | Avoid over-aerating the batter. Let the cake cool completely before slicing for clean edges. |
| Crumb | Fine and even distribution of small bubbles. | No large tunnels or dense, gluey patches. | Do not over-mix after adding flour. Sift dry ingredients for even distribution. |
| Frosting Texture | Thick, glossy, smooth, with defined swirls and waves. | Frosting is rich, not gritty or runny. | Use quality chocolate and butter. Ensure all ingredients are properly emulsified (often by warming). |
| Overall Look | Generous layer of frosting, perfectly cut squares. | Shows care and attention to detail. Professional presentation. | Frost edge-to-edge. Use a sharp, clean knife for each cut. Plan your grid. 📏 |
Step-by-Step to Chocolate Perfection
🟢Ready to recreate this marvel? While I won’t give a full recipe here (that’s for your final blog post!), here are the crucial procedural steps to keep in mind, mimicking the quality seen in the photo.
- Prep Your Pan: The aluminum foil in the photo is key! It makes removing the entire cake slab for perfect slicing a breeze. Spray the pan, line it with a foil sling, and spray the foil too.
- Combine the Dry: Sift together the flour, quality cocoa, sugar, baking soda, and salt. Sifting is non-negotiable for a professional crumb.
- Mix the Wet: Whisk together your buttermilk (or sour cream alternative), oil, eggs, and vanilla.
- The Hot Liquid: Many of the best recipes call for adding boiling hot water or hot coffee last. This “blooms” the cocoa powder, deepening the flavor, and creates a thin batter that bakes up beautifully moist.
- Bake with Care: Bake just until a toothpick comes out with a few moist crumbs attached. An overbaked cake is a sad, dry cake. ⏰
- Cooling and Frosting: This is vital. Let the cake cool completely in the pan before lifting it out using the foil.
- Make the Frosting: Prepare your rich, pourable chocolate frosting. It should be warm and glossy.
- The Pour and Swirl: Pour the frosting over the cooled cake. Use an offset spatula to spread it to the edges. Now, for the artistic part: use the tip of the spatula or the back of a large spoon to create those signature swirls and waves. Work quickly before the frosting sets.
- The Set and Slice: Let the frosting set completely. For those picture-perfect squares (like in the image), pop the frosted cake in the fridge for 20-30 minutes to firm up. Lift the cake out of the pan, peel back the foil, and use a sharp knife. Clean the knife between each cut! 🧼🍴
Variations to Explore
🟢Once you master the classic, the world is your chocolate-covered oyster:
- The Texas Sheeter: A variation with nuts (usually pecans) in the frosting.
- Peanut Butter Swirl: Swirl warmed peanut butter into the frosting before it sets. 🥜
- The Adult Version: Add a tablespoon of bourbon or Kahlua to the frosting. 🥃
- Sprinkle Joy: For birthdays, a generous dose of rainbow sprinkles is a must. 🎉
Conclusion: More Than Just a Cake
🟢The chocolate sheet cake in this image isn’t just about ingredients; it’s a shared experience. It’s a guaranteed crowd-pleaser that delivers comfort in every bite. With the right ingredients, a gentle mixing hand, and a commitment to that gorgeous, swirled frosting, you can create a masterpiece that looks every bit as enticing as the one you see here. So, grab your mixing bowls, turn on the oven, and prepare to bask in the glow of a job well done (and the deliciousness of that first, perfect bite). Happy Baking! 🎂❤️