🟢The Ultimate Step-by-Step Guide 🪴✂️
🟢If you want to turn a single healthy Snake Plant (Sansevieria trifasciata) into dozens of brand-new, thriving houseplants, propagating leaf cuttings in perlite is one of the fastest, cleanest, and most reliable methods available today. While traditional water propagation can lead to leaf rot and soil propagation often makes it difficult to monitor root progress, perlite provides the absolute best of both worlds: superior aeration and optimal moisture retention.
🟢Whether you are a seasoned plant enthusiast or a beginner looking to expand your indoor jungle on a budget, this comprehensive guide covers everything you need to know about propagating snake plant leaf cuttings in perlite with maximum success! 🌿✨
Why Propagate Snake Plants in Perlite? 🌟
🟢Perlite is a lightweight, volcanic glass mineral expanded by heat into porous, white granules. It has quickly become a favorite propagation medium among houseplant collectors across the world. Here is why it works so well for snake plant cuttings:
- Prevents Root Rot: Snake plant cuttings are notoriously susceptible to fungal infections and rot in overly wet conditions. Perlite retains minimal excess moisture while draining efficiently. 💧
- Maximum Aeration: Root development requires oxygen just as much as water. Perlite creates tiny air pockets around the cut leaf edge, accelerating rapid root cell division. 🌬️
- Transparent Moisture Control: When combined with a clear glass dish or plastic cup, perlite allows light to pass through while letting you inspect root formation without disturbing the cutting. 👁️
- Clean & Sterile: Unlike garden soil, commercial horticultural perlite is sterile, disease-free, and inert, drastically reducing the risk of bacterial stem decay. 🧼
Propagation Medium Comparison Guide 📊
🟢Choosing the right medium for propagating Sansevieria leaf cuttings depends on your environment and care routine. Below is a detailed comparison of perlite versus traditional water and soil propagation methods.
| Propagation Feature | Perlite Propagation ⚪ | Water Propagation 💧 | Soil Mix Propagation 🪵 |
|---|---|---|---|
| Rot Prevention | Excellent (High aeration) | Moderate (Risk of anaerobic decay) | Moderate to Low (Depends on drainage) |
| Root Growth Speed | Very Fast (3 to 5 weeks) | Moderate (4 to 6 weeks) | Slow to Moderate (5 to 8 weeks) |
| Air Oxygen Level | Exceptionally High | Low (unless water changed daily) | Moderate |
| Ease of Monitoring | Easy (In clear container) | Very Easy | Hard (Requires pulling or digging) |
| Transplant Shock | Minimal (Sturdy root structure) | High (Fragile water roots) | Very Low (Roots already accustomed to substrate) |
| Best For | Beginners & High Success Rate | Visual Water Rooting | Experienced Growers / Large Scale |
Step-by-Step Guide to Propagating Snake Plants in Perlite 👩🌾👨🌾
Step 1: Select & Cut Healthy Leaves ✂️
- Select a healthy, mature snake plant leaf with vibrant green and yellow variegation. Avoid soft, yellowing, or diseased foliage.
- Using a clean, sterilized pair of shears or a razor blade, make a sharp cut at the base of the leaf near the soil line.
- Cut the long leaf into smaller segments approximately 3 to 5 inches (8 to 12 cm) in length.
- Crucial Rule: Always remember the bottom orientation of each leaf slice! Snake plant cuttings are polar—if you place a slice upside down in the medium, it will never grow roots.
Step 2: Callus the Cut Edges ⏳
- Place your cut leaf segments on a clean paper towel or dry plate in a well-ventilated room away from direct, harsh sunlight.
- Allow the cut ends to dry out and form a hard, dry skin (callus) for 24 to 48 hours.
- Why this step matters: Placing freshly cut, wet plant tissue directly into moist medium invites bacteria. Callusing seals the wound and protects the cutting from decay.
Step 3: Prepare the Perlite Setup 🥣
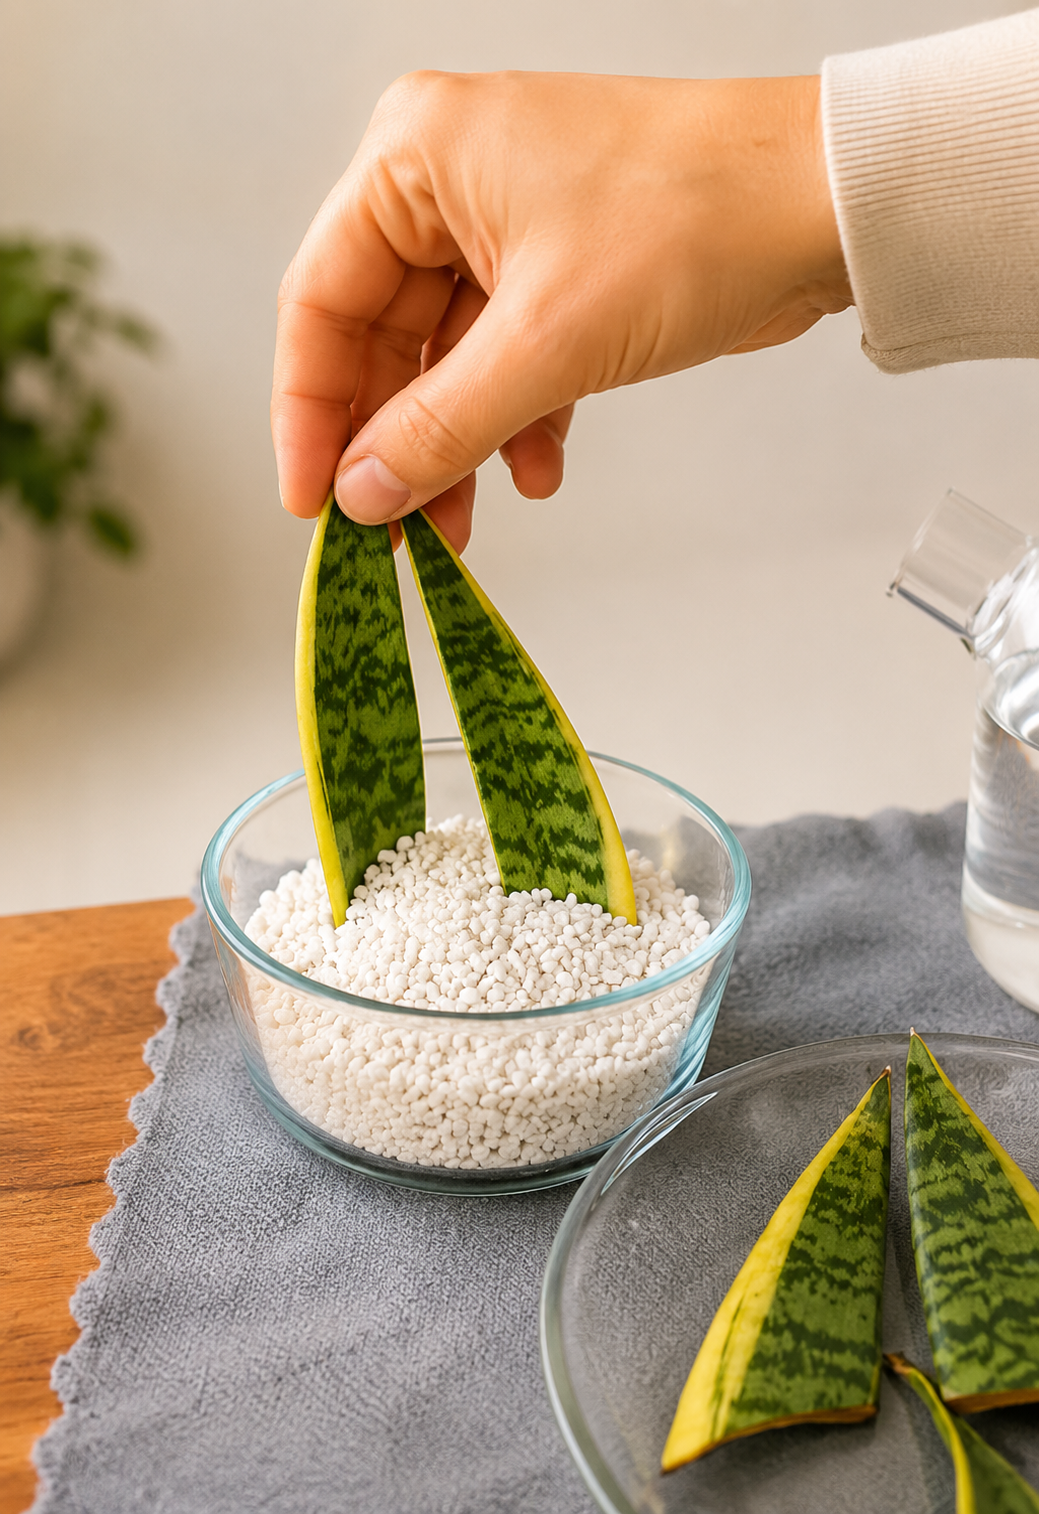
- Take a clean glass bowl, clear plastic container, or propagation dish (as shown in the featured photo).
- Fill the container with coarse, dust-free horticultural perlite.
- Moisten the perlite with clean, distilled, or filtered water until it is damp but not submerged. Drain away any pooled water at the bottom of the container.
Step 4: Insert the Cuttings 🌿
- Insert the callused bottom edge of each leaf segment vertically into the perlite, embedding them about 1 to 1.5 inches deep so they stand upright firmly.
- Ensure the cuttings are spaced slightly apart to allow good airflow between segments.
- Gently press the perlite around the base of each cutting to hold it stably in place.
Caring for Your Perlite Cuttings During Rooting 🌡️💡
🟢To ensure rapid root formation and tiny new shoots (pups), maintain these optimal environmental conditions:
- Light Requirements: Place your propagation dish in a bright location with bright, indirect sunlight. Avoid harsh, direct afternoon rays that can scorch the leaf slices or overheat the container. ☀️
- Moisture Management: Keep the perlite slightly damp. Spray or pour a few spoonfuls of water around the perlite once a week as it dries out. Do not let the perlite sit in standing water. 💧
- Temperature & Humidity: Snake plants root fastest in warm conditions between 70°F to 85°F (21°C to 29°C). Keep cuttings away from cold drafty windows or air conditioning vents. 🌡️
Pro Tips for Maximum Propagation Success 💡
- Use Cinnamon as a Natural Fungicide: Before inserting your dry, callused cuttings into perlite, dip the bottom edge lightly into ground cinnamon powder to naturalize bacteria protection and boost root stimulation. 🪵
- Notch the Cut Base: Cutting a shallow V-shape inverted notch at the base of the leaf slice increases the surface area for root production and helps you identify the bottom side! ✂️
- Note on Variegated Varieties: When propagating variegated snake plants (such as Sansevieria trifasciata ‘Laurentii’ with yellow margins) via leaf cuttings, the new offspring shoots will usually revert to solid green. To maintain yellow borders, plant division via rhizomes is required. 🎨
Troubleshooting Common Issues 🛠️
- Soggy or Soft Yellowing Base: This indicates overwatering or insufficient callusing before planting. Remove the cutting, slice off the mushy bottom portion, let it callus for 2 days, and reinsert into drier perlite. 🍂
- Shriveled Leaf Segments: Low humidity or dry perlite causes the cutting to lose moisture. Spray the perlite with fresh water or place a clear plastic bag loosely over the top to create a mini greenhouse. ⛺
- No Root Progress After 4 Weeks: Snake plants root slowly during colder winter months. Move your setup to a warmer room or use a horticultural heat mat underneath the dish. ☀️
Transplanting New Pups into Pots 🪴
🟢After 4 to 6 weeks, you will notice firm white roots developing throughout the perlite. Soon after, tiny green rhizome shoots (pups) will sprout next to the main leaf cutting.
🟢Once the roots reach 1 to 2 inches long and the new shoots emerge above the perlite level, gently lift the cutting out. Plant the rooted cutting and pup together into a small pot filled with a gritty, well-draining succulent or cactus potting mix (e.g., 50% potting soil, 25% perlite, 25% orchid bark). Water lightly and enjoy your brand-new snake plant! 🥳🌱
Frequently Asked Questions (FAQ) ❓
How long does it take for snake plant cuttings to root in perlite?
🟢Under warm conditions with bright indirect light, roots usually begin to appear in 3 to 4 weeks, with new shoots forming between 6 to 10 weeks.
Do I need to add fertilizer to perlite propagation?
🟢No! Unrooted cuttings cannot process nutrients. Wait until you transplant the rooted cuttings into proper soil before applying dilute houseplant fertilizer.
Can I leave snake plants in perlite permanently?
🟢While perlite is great for rooting, it lacks long-term nutrients and stability. Transplant your cuttings into soil once healthy roots and new shoots have established.