If you are an indoor plant enthusiast, home gardener, or plant parent looking to shape your Christmas Cactus (Schlumbergera) while expanding your houseplant collection, look no further 🌵✨! Pruning tropical epiphyte cacti keeps your plant bushy, encourages prolific flower bud development, and provides healthy leaf cuttings perfect for water or soil propagation 🛡️🌸.
By trimming segmented stem cladodes cleanly near joint intersections using sharp pruning shears or by twisting gently at the node, you promote dense branching while harvesting viable cuttings. Let’s break down the complete material and care matrix, a step-by-step 4-stage pruning and propagation guide, substrate requirements, and professional botanical care secrets for guaranteed houseplant success!
🛒 Master Ingredient Matrix & Botanical Care Specifications
Nurturing a healthy, bushy Christmas Cactus requires balancing proper pruning tools, aerated potting media, well-drained terracotta containers, and bright indirect window light 🌵🛡️. Here is your master specifications breakdown 📋✨:
| Care Component | Material & Tool Specifications | Botanical Function & Horticultural Impact | Recommended Organic Alternatives |
|---|---|---|---|
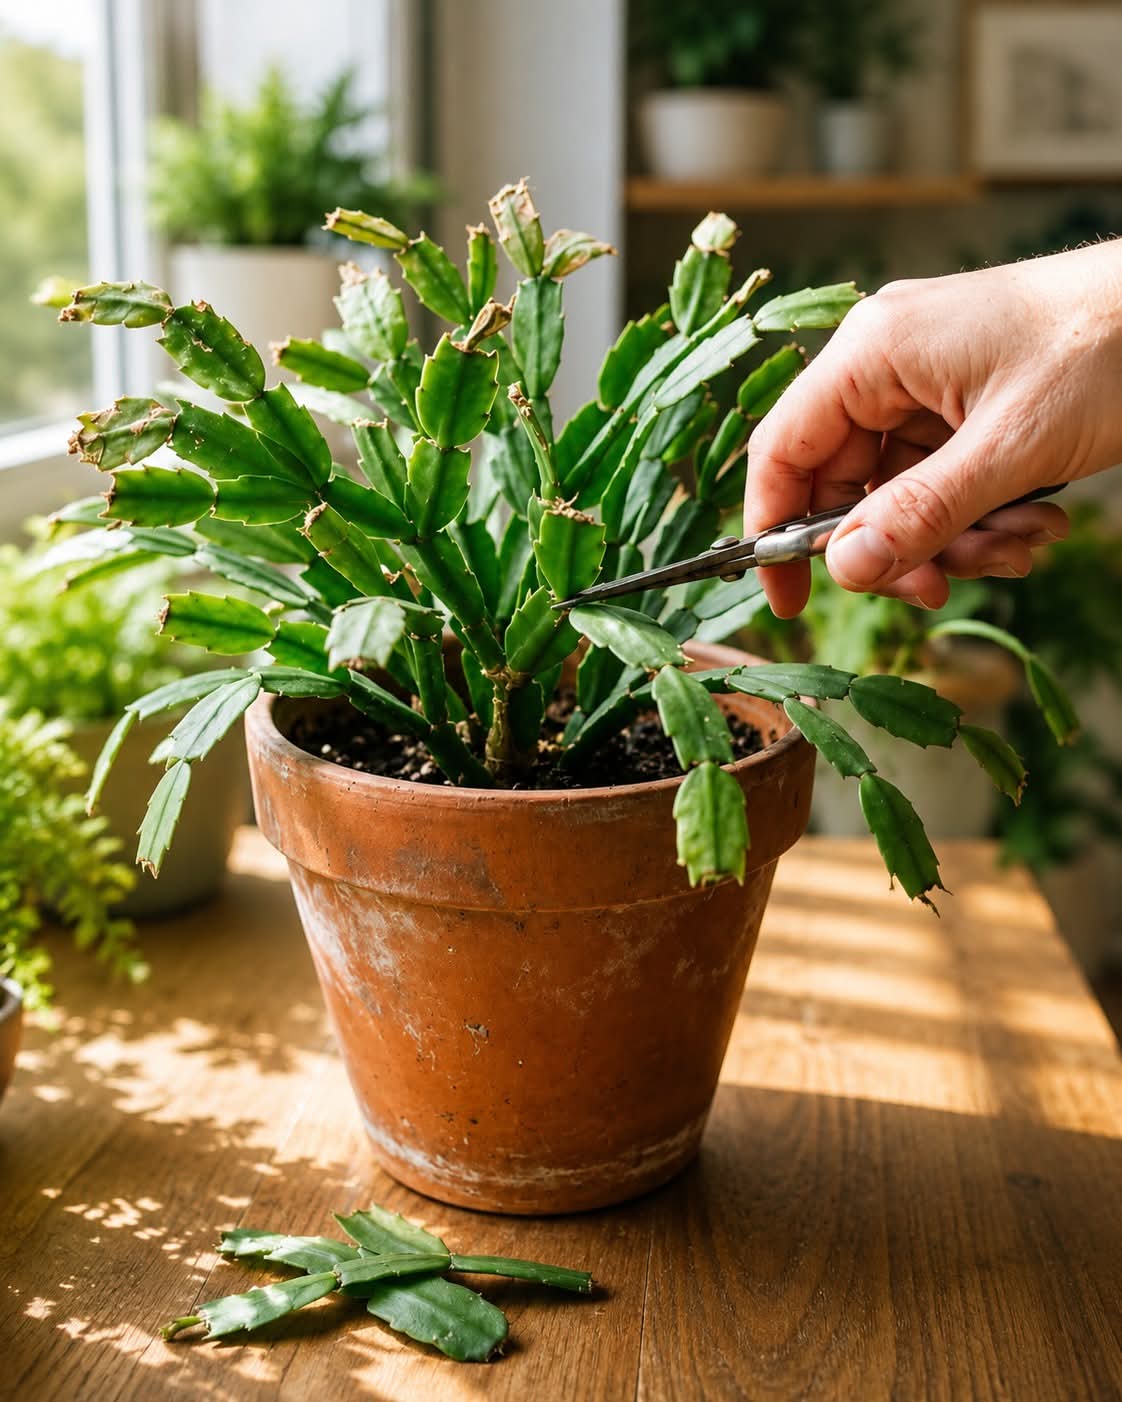
| Plant Specimen 🌵 | Potted Christmas Cactus (Schlumbergera) | Primary epiphytic succulent featuring flattened, segmented green stems (pictured center). | Thanksgiving Cactus (Schlumbergera Truncata) or Easter Cactus. |
| Pruning Tool ✂️ | Micro-Tip Snips / Pruning Shears | Delivers precise, clean cuts at joint nodes without crushing surrounding stem tissue (pictured). | Sterilized Razor Blade or Gentle Finger Twist. |
| Harvested Cuttings 🌿 | 2–4 Segment Leaf Cuttings | Healthy stem segments pruned off mother plant, ready for propagation callousing (pictured on table). | Rooted Stem Divisions or Water-Rooted Cuttings. |
| Terracotta Container 🏺 | Unglazed Terracotta Clay Pot | Porous clay wall material promotes air flow and rapid soil drying to prevent root rot (pictured). | Ceramic Pot with Bottom Drainage Hole. |
| Aerated Substrate 🪵 | Succulent Soil + Perlite + Orchid Bark | High-porosity potting mix that provides oxygen to roots while retaining gentle ambient humidity. | Coco Coir mixed with Pumice Granules. |
| Lighting Setup ☀️ | Bright, Indirect Window Light | Fuels active photosynthesis and growth without burning soft succulent tissue (pictured background). | Diffused LED Grow Lamp. |
👩🌾 Step-by-Step Christmas Cactus Pruning & Propagation Guide
Follow this simple 4-stage botanical guide to inspect your plant, trim stem segments cleanly, callous leaf cuttings, and root new plants, exactly as demonstrated in the indoor gardening setup 🌵✨!
Step 1: Inspect Plant Structure & Prep Pruning Shears ✂️🪵
- Place your potted Christmas Cactus on a clean wooden table near a bright window (as shown in the main image).
- Examine the overall shape of the plant to identify leggy, sparse, or overgrown stems that need trimming.
- Sterilize your pruning shears or micro-tip scissors using rubbing alcohol or isopropyl wipes to prevent transferring plant pathogens.
- Locate the natural joint intersections (nodes) connecting flattened green stem segments (cladodes).
Step 2: Make Clean Pruning Cuts at Stem Joints ✂️🌿
- Hold a target stem gently with one hand and position your cutting blade directly at the joint between two leaf segments (as demonstrated in the action shot).
- Make a quick, clean cut right through the narrow joint connector. Alternatively, you can pinch the segment gently and twist clockwise until it snaps off cleanly at the node.
- Prune off 2 to 4 segments from longer branches to encourage branching behind the cut.
- Collect healthy green stem cuttings on your wooden workbench (as pictured laying on the table surface below the pot).
- Botanical Secret: Pruning in late spring or early summer right after the blooming cycle forces the plant to produce two new stem segments at the cut joint, doubling future flower yields!
Step 3: Callous Cuttings & Prepare Propagation Media 🌿⏳
- Place harvested green stem cuttings in a dry, shaded area for 24 to 48 hours.
- Allow raw cut edges to dry out and form a thin protective callous skin, which prevents fungal rot when planted.
- Prepare a small pot with a light, well-draining substrate made of equal parts cactus potting soil, perlite, and coarse sand.
- Moisten substrate slightly with water so it feels damp but not soggy or waterlogged.
Step 4: Root Cuttings in Soil or Water & Care ☀️🌱
- Soil Propagation: Insert calloused cut ends roughly 1/2 inch deep into prepared potting soil so segments stand upright. Press soil lightly around bases to secure them.
- Water Propagation: Place calloused cuttings in a glass bottle filled with room-temperature water so only the bottom node touches liquid.
- Place propagation container in bright, indirect sunlight (65°F to 75°F / 18°C to 24°C).
- For soil propagation, mist surface lightly when top layer feels dry; roots typically develop within 3 to 4 weeks!
- Once roots reach 1 inch in length, pot young plants into individual terracotta pots to grow into bushy specimens.
💡 Pro Secrets for Thriving Christmas Cacti
- Never Use Heavy Standard Soil: Epiphytic cacti naturally grow on trees in rainforests! Always use airy, porous substrates containing orchid bark or perlite to allow root respiration 🪵.
- Master the Bloom Cycle: To trigger abundant winter blooms, give your plant 12 to 14 hours of continuous darkness each night starting in early autumn 🌸.
- Avoid Waterlogging Clay Pots: Terracotta pots dry out quickly, which is ideal for preventing root rot! Water thoroughly only when top half of soil feels dry 🏺.
Incorporate this simple pruning and propagation routine into your indoor plant care schedule today to grow fuller cacti and share green cuttings with friends! 🌵✨🛡️🌸