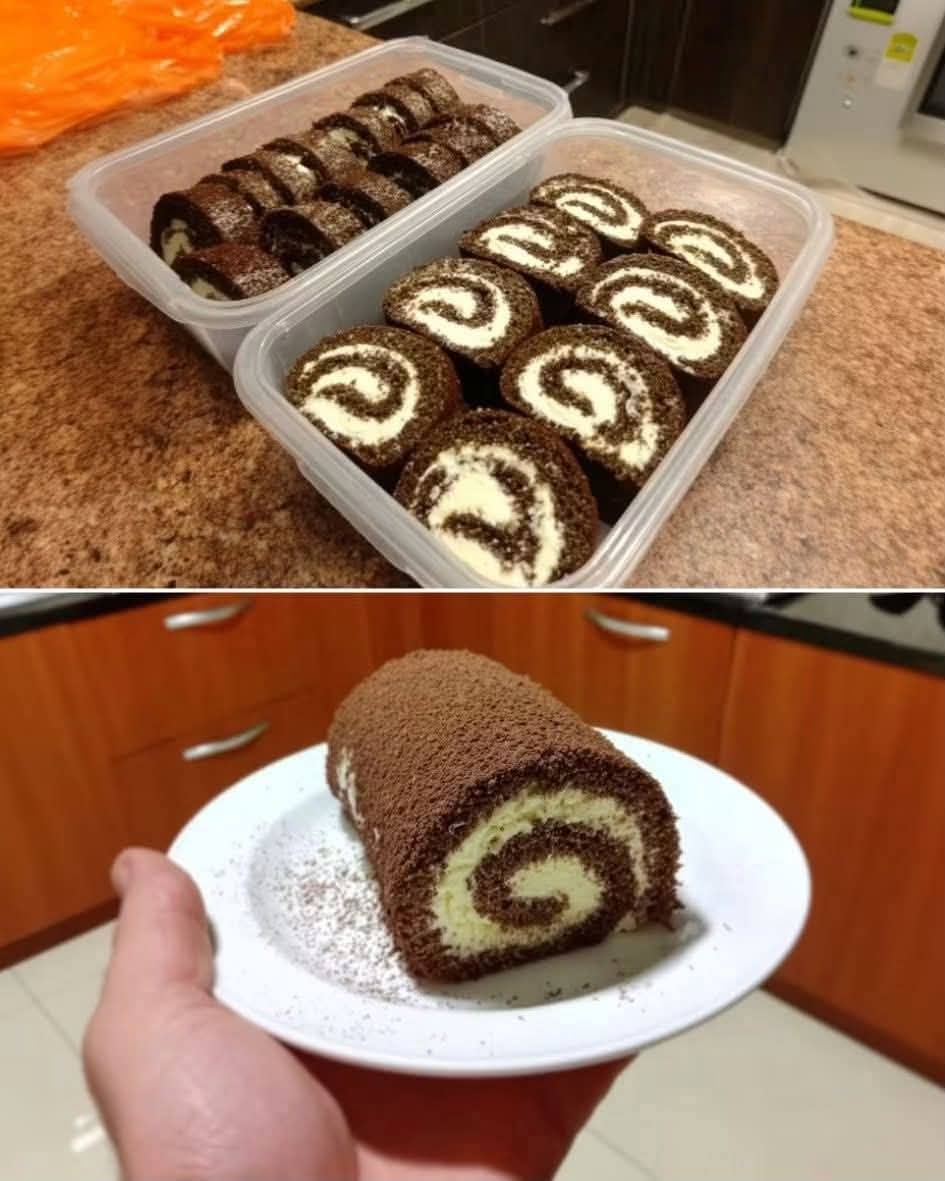
If you are a dessert enthusiast, home baker, or sweet tooth searching for an irresistible, bakery-style cake roll that is soft, decadent, and filled with silky cream, look no further ✨! This Chocolate Swiss Roll Cake (or Chocolate Swiss Log) is the ultimate chocolate indulgence 🍫. Featuring a light-as-air sponge cake layer, a velvety vanilla cream filling, and a delicate coating of fine cocoa powder, this recipe turns simple baking pantry staples into a showstopping dessert.
Rolling a tender cocoa sponge cake without cracking can feel intimidating, but using a warm-rolling technique with parchment paper guarantees a seamless spiral every single time 🍰. Whether you are baking for weekend celebrations, meal-prepping sweet snack containers for the week, or impressing guests at afternoon tea, this step-by-step recipe delivers perfection. Let’s dive into the master recipe specifications, culinary instructions, exact ingredient ratios, and pro baker secrets to master this decadent chocolate swiss roll!
🛒 Master Recipe Specifications & Ingredient Ratios
Achieving that velvety, crack-free spiral requires balancing whipped egg whites, unsweetened Dutch-process cocoa, and a stabilized cream filling 🍫✨. Here is your master specifications breakdown 📋✨:
| Recipe Component | Key Ingredients & Exact Quantities | Culinary Purpose & Flavor Profile | Easy Substitute Options |
|---|---|---|---|
| Sponge Base 🍫 | 4 Large Eggs (Separated) + ½ Cup Sugar + ⅓ Cup Dutch Cocoa | Whipped egg whites incorporate air pockets for a flexible, pillow-soft chocolate sponge. | Cake Flour + Dark Cocoa Powder Blend. |
| Flour & Binding 🌾 | ½ Cup All-Purpose Flour + 1 tsp Baking Powder + ¼ tsp Salt | Provides light structural support so the sponge holds its shape during rolling. | 1:1 Gluten-Free Baking Flour. |
| Silky Cream Filling 🍦 | 1 Cup Heavy Whipping Cream + ⅓ Cup Powdered Sugar + 1 tsp Vanilla | Whipped into stiff peaks to create a rich, white contrast spiral (pictured). | Cream Cheese Frosting or Marshmallow Fluff. |
| Decorative Coating 🍫 | 2 Tbsp Unsweetened Cocoa Powder (For Dusting) | Lightly dusted over the outer roll for an elegant cocoa velvet finish. | Melted Dark Chocolate Ganache Drizzle. |
| Storage Containers 📦 | Airtight Clear Plastic Meal-Prep Boxes | Keeps sliced roll portions fresh, moist, and organized for easy storage (pictured). | Glass |
👩🌾 Step-by-Step Culinary Preparation Guide
Follow this simple 4-step baking guide to whip, roll, fill, and slice your chocolate swiss roll, exactly as shown in the featured kitchen prep photograph 🍰✨!
Step 1: Bake the Flexible Chocolate Sponge 🍫✨
- Preheat your oven to 350°F (175°C) and line a 10×15-inch jelly roll baking pan with parchment paper. Lightly grease the top of the paper.
- Separate 4 large room-temperature eggs into two bowls. Beat the egg yolks with ¼ cup of sugar until pale and creamy.
- In a clean dry bowl, whip the egg whites with the remaining ¼ cup of sugar using an electric mixer on high speed until stiff, glossy peaks form.
- Sift ½ cup all-purpose flour and ⅓ cup Dutch-process cocoa powder into the yolk mixture, then gently fold in the whipped egg whites using a rubber spatula until smooth and airy.
- Spread the batter evenly into the prepared pan and bake for 10 to 12 minutes until the top springs back when lightly touched!
Step 2: Warm-Roll the Sponge 📜✨
- Right after taking the cake out of the oven, dust a clean kitchen towel or parchment sheet generously with cocoa powder.
- Invert the hot sponge cake onto the dusted towel and carefully peel away the baked parchment paper.
- Starting from the short end, gently roll the warm cake and towel together into a log shape.
- Allow the rolled cake to cool completely at room temperature for about 45 minutes.
- Baker’s Secret: Rolling the sponge while warm trains the cake fibers into a spiral shape, completely eliminating cracks when filled later!
Step 3: Fill with Vanilla Cream and Chill 🍦🍰
- Whip 1 cup of cold heavy whipping cream, ⅓ cup of powdered sugar, and 1 teaspoon of vanilla extract in a chilled bowl until stiff peaks form.
- Carefully unroll the cooled chocolate sponge cake onto your counter.
- Spread the vanilla cream filling in an even layer over the cake surface, leaving a ½-inch border along the edges.
- Re-roll the cake tightly without the towel around the sweet filling layer. Wrap the log tightly in plastic wrap and chill in the refrigerator for at least 2 hours.
Step 4: Dust, Slice, and Pack 🍽️✨
- Remove the chilled chocolate log from the plastic wrap and dust the outer surface evenly with fine cocoa powder using a small sifter (as shown on the white plate).
- Using a sharp, serrated knife, slice off the uneven end pieces, then cut the log into uniform 1-inch roll slices to reveal the striking white-and-chocolate spiral.
- Pack individual sliced rolls into clear plastic food-prep containers for neat storage, perfect for weekly desserts (as displayed in the upper photo)!
💡 Pro Baker Secrets for Perfect Chocolate Roll Cakes
- Whip Egg Whites to Proper Stiff Peaks: The lift and flexibility of a Swiss roll come entirely from whipped egg whites 🍰! Make sure your mixing bowl is completely free of oil or water so the whites whip up into stable, airy peaks.
- Never Skip Warm Rolling: If you let the sponge cool flat before rolling, the cake will snap and break when you try to shape it 🍫. Always roll it up immediately while steam is still trapped in the fibers!
- Slice with a Clean Warm Knife: To achieve crisp, picture-perfect cream spirals without smearing, wipe your serrated knife clean with a warm paper towel between every single slice.
Try this simple, foolproof Chocolate Swiss Roll recipe today to create a bakery-style chocolate dessert that looks as amazing as it tastes! 🍰✨🍫