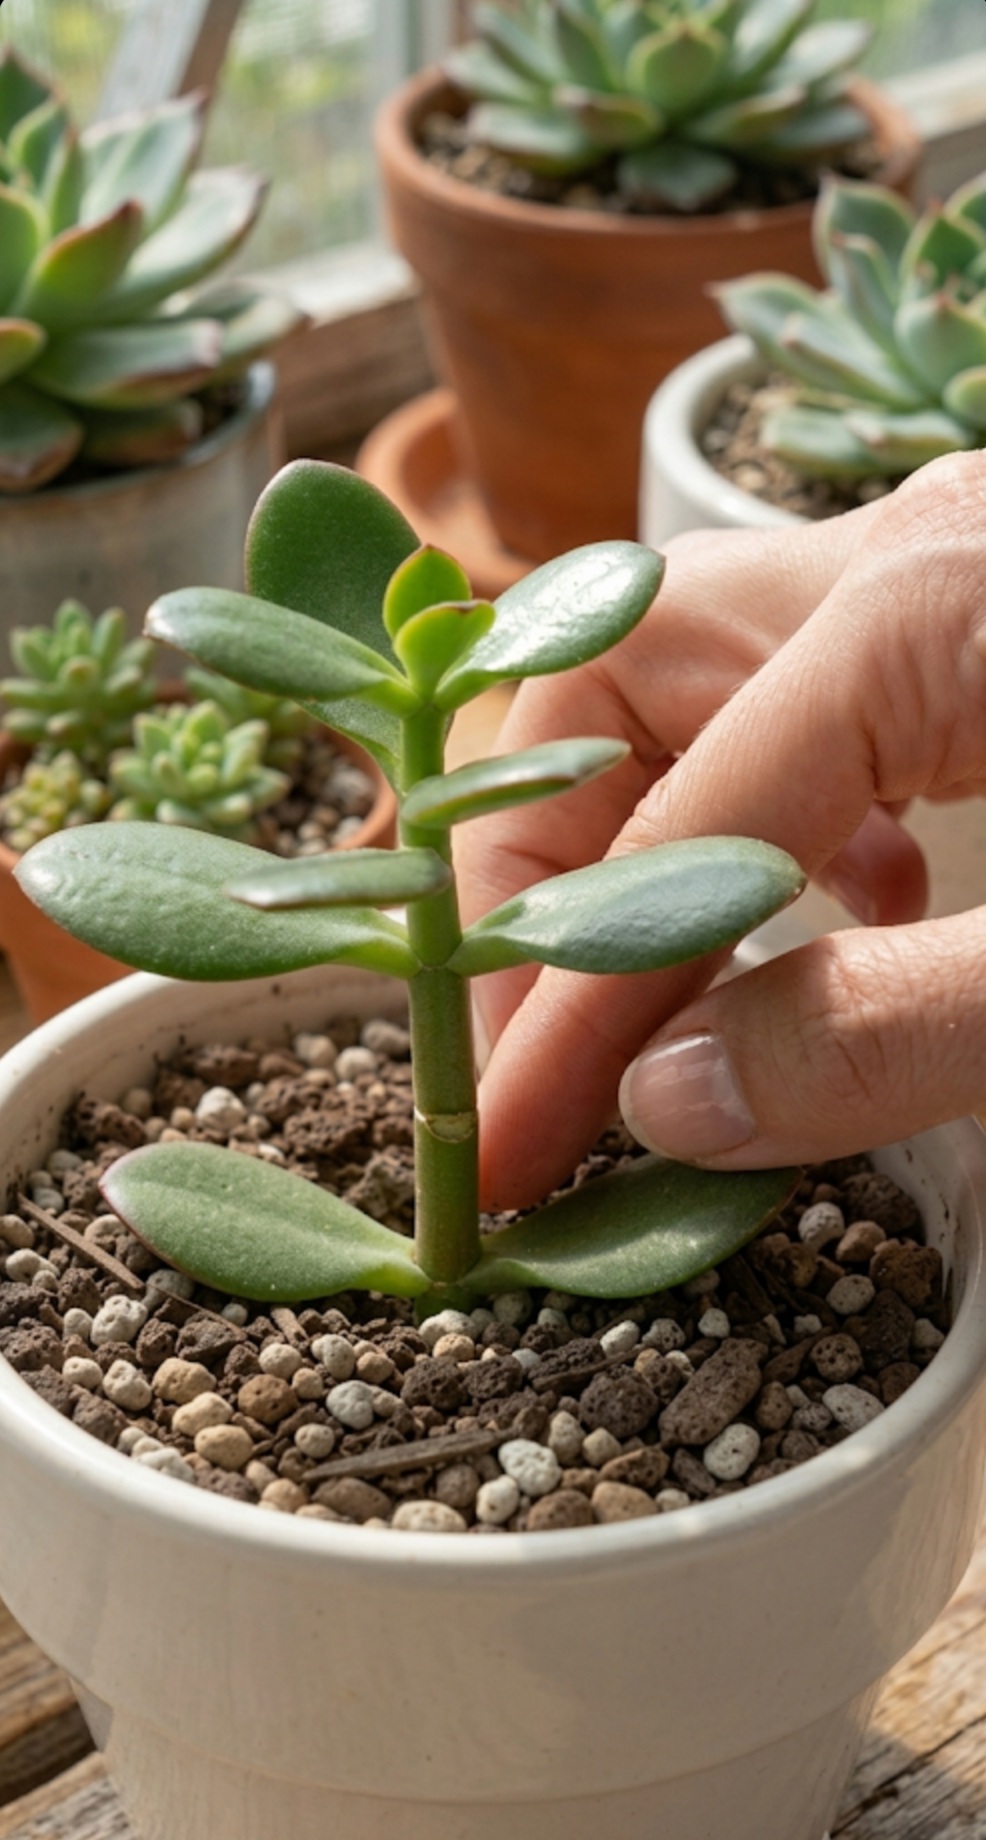
Every indoor plant parent knows the unique delight of watching a succulent collection expand across window sills, shelf displays, and desk spaces. 🏡✨ Renowned for their plump, fleshy leaves, architectural forms, and extreme drought resistance, succulents like the Jade Plant (Crassula ovata) and various Echeveria varieties are undisputed favorites among plant lovers. 🌿💚 However, despite their resilient nature, potted succulents can sometimes grow leggy, tall, or sparse over time when kept indoors, leaving plant owners wondering how to encourage dense, bushy growth without purchasing expensive new plants. 🌾😔
What if the ultimate secret to multiplying your succulent collection, fixing tall leggy stems, and encouraging thick, branched foliage was right at your fingertips? ✂️🪴 In this complete blog post, we will explore an extraordinarily simple, hands-on propagation technique—potting clean stem cuttings directly into specialized, gritty substrate—that acts as a powerful growth catalyst for indoor succulents! 🛡️🌟 Discover the step-by-step method shown in the image above, learn how to prepare the ideal mineral potting mix, and master long-term succulent care to turn single stems into lush, full indoor treasures. 🧪🪴✨
Why Stem Propagation Keeps Succulents Healthy & Bushy 🪴🛡️
In their natural habitats across arid regions of South Africa and South America, succulents thrive in rocky, free-draining terrain where broken stems quickly root into gritty soil after rainstorms. 🌵☀️ Replicating this natural regeneration process through stem cuttings offers incredible benefits for indoor gardeners:
- Instant Collection Multiplication 💸✨: Turn a single tall succulent stem into multiple individual potted plants without spending money at commercial nurseries.
- Fixing Leggy, Weak Stems ✂️💪: Trimming stretched stems encourages the parent plant to produce two or three new branches at the cut point, creating a fuller, bushier crown.
- Prevents Moisture-Related Root Rot 🛡️🌾: Potting fresh stem cuttings into gritty, porous mineral substrates ensures rapid drainage, protecting delicate emerging root initial cells from moisture decay.
- High Success Rate for Beginners 📈👍: Succulents store high amounts of water and nutrients in their fleshy stems and leaves, giving cuttings the internal energy needed to root easily.
📊 Comprehensive Guide: Stem Propagation vs. Leaf Propagation
To help you choose the best multiplication method for your succulent variety, explore the detailed breakdown below:
| Feature & Care Aspect 🏷️ | Stem Cutting Propagation ✂️🪴 | Leaf Propagation 🍃✨ |
|---|---|---|
| Growth & Rooting Speed | Rapid (Roots establish within 2 to 3 weeks) ⚡ | Slow (Takes 6 to 12 weeks to form plantlets) ⏳ |
| Initial Plant Size | Produces a mature, established plant quickly 🌿 | Produces tiny, delicate miniature offsets 👶 |
| Failure Rate & Rot Risk | Low (When stem callus is properly formed) 🛡️ | Moderate (Single leaves can dry out or rot easily) ⚠️ |
| Rooting Medium Needed | Gritty, porous succulent mix (perlite, pumice, sand) 🪨 | Shallow soil bed or tray 🪴 |
| Best Season to Perform | Spring and early summer (Active growing season) ☀️ | Spring and summer months ☀️ |
| Structural Benefit | Corrects tall leggy stems and forces branching 🌳 | Great |
🛠️ Tools & Materials Checklist
Gather these simple, essential supplies before taking your succulent cuttings:
- Healthy Parent Succulent 🪴: A vibrant Jade plant or fleshy succulent with thick, firm leaves and sturdy stems.
- Sterilized Pruning Shears or Knife ✂️🛡️: Clean blades with rubbing alcohol to prevent transferring bacterial or fungal pathogens to open plant wounds.
- Gritty Succulent Potting Mix 🪨: A fast-draining substrate blend containing coarse sand, pumice, perlite, and fine volcanic rock.
- Potted Container with Drainage 🪴: A ceramic or terracotta pot equipped with large bottom drainage holes to prevent water retention.
- Room-Temperature Water 🚿: For gentle, controlled hydration once initial roots form.
✂️ Step-by-Step Guide: How to Propagate & Plant Succulent Cuttings
Step 1: Taking Precision Cuttings & Callusing ✂️🪵
Proper stem preparation is the single most important factor in preventing stem rot and ensuring successful root growth:
- Select a healthy, erect stem on your parent succulent that has several sets of plump leaves.
- Using sterilized shears, make a clean cut across the stem 1 to 2 inches below a leaf node.
- Gently remove the lowest pair of leaves to expose 1 inch of bare stem at the bottom.
- Crucial Step: Place the cutting in a dry, shaded location for 2 to 4 days to allow the raw stem cut to heal and form a dry, protective callus tissue over the wound.
Step 2: Preparing the Gritty Substrate & Potting 🪨🪴
Once the stem cut is dry and callused, prepare the potting vessel for planting:
- Fill your container with a dry, well-aerated succulent substrate mix (such as equal parts potting soil, perlite, and volcanic grit).
- Create a small hole in the center of the mix using your finger or a wooden pencil.
- Insert the callused stem cutting into the soil as shown in the visual guide, pressing the gritty substrate firmly around the base with your finger to stabilize the stem upright.
Step 3: Moisture Management & Root Activation ☀️💧
Rooting succulent cuttings requires a slightly different watering approach than established adult plants:
- Initial Dry Period 🚫: Do not water the cutting for the first 3 to 5 days after planting. This encourages the stem to send out new roots searching for moisture.
- Light Mist & Watering 🚿: After the dry period, lightly moisten the top layer of gritty mix around the stem perimeter once every 7 to 10 days using room-temperature water.
- Bright Indirect Sun ☀️: Place the pot near a bright windowsill protected by sheer curtains. Avoid intense, scorching direct sun while new roots are forming.
Step 4: Long-Term Succulent Care & Maintenance 🗓️✨
Within 3 to 4 weeks, your cutting will establish a strong root network anchoring it securely into the pot:
- Testing Root Anchorage 🌾: Gently tug the stem; firm resistance indicates that a healthy root system has developed beneath the soil.
- Regular Watering Schedule 💧: Switch to the standard “soak and dry” watering method—water deeply until liquid drains from the bottom, then let the soil dry out 100% before watering again.
- Seasonal Feeding 🧪: Apply a diluted, low-nitrogen succulent fertilizer once a month during spring and summer to maintain deep green foliage and plump leaves.
🛡️ Pro Troubleshooting & Care Tips
- Soft, Wrinkled Leaves 🍂: A classic sign of dehydration once roots have formed. Give the pot a thorough watering and ensure it receives adequate ambient light.
- Black, Mushy Stem Base 🖤: Indicates stem rot caused by planting uncallused cuttings or over-watering wet soil. Cut the stem above the rotted area, let it callus completely, and re-pot into fresh, dry gritty substrate.
- Stretched, Pale Growth ☀️❌: Signals that your succulent needs more light. Gradually move the plant to a brighter window position to keep leaf nodes compact and thick.
By following this simple, step-by-step propagation guide, you can easily transform a single stem into a lush, thriving collection of beautiful, long-lasting indoor succulents! Happy planting! 🪴✨💚